How To Change The Blade On A Husky Utility Knife
Arias News
Mar 16, 2025 · 6 min read
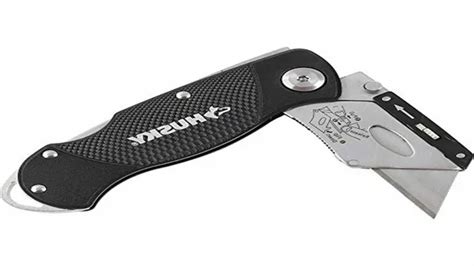
Table of Contents
How to Change the Blade on a Husky Utility Knife: A Comprehensive Guide
Husky utility knives are a staple for DIY enthusiasts and professionals alike, offering durability and versatility for a wide range of cutting tasks. However, like any utility knife, the blades eventually dull and require replacement. Knowing how to safely and efficiently change a Husky utility knife blade is crucial for maintaining its functionality and ensuring your safety. This comprehensive guide will walk you through the process step-by-step, covering various Husky knife models and addressing common issues.
Understanding Your Husky Utility Knife
Before diving into the blade-changing process, it's essential to understand the specific model of your Husky utility knife. While the general principles remain consistent across many models, minor variations in the blade release mechanism might exist. Familiarize yourself with your knife's design – take a moment to examine the mechanism that holds the blade in place. Look for buttons, sliders, or levers. This initial observation will significantly streamline the blade replacement process.
Safety First: Essential Precautions
Working with sharp blades demands utmost caution. Before you begin, take these critical safety precautions:
- Wear appropriate safety gear: Gloves are highly recommended to protect your hands from accidental cuts. Safety glasses are also advisable to protect your eyes from flying debris.
- Work in a well-lit area: Proper lighting ensures you can clearly see what you are doing, minimizing the risk of accidents.
- Use a stable work surface: Ensure a stable and clutter-free workspace to prevent the knife from slipping or falling.
- Keep children and pets away: Never allow children or pets near your workspace when handling sharp objects.
- Dispose of used blades properly: Never throw used blades in the regular trash. Use a puncture-resistant container specifically designed for disposal of sharp objects. Many hardware stores sell such containers.
Step-by-Step Guide to Changing a Husky Utility Knife Blade
The process of changing a blade on a Husky utility knife usually involves these key steps:
Step 1: Preparing the Knife
- Inspect the blade: Assess the current blade’s condition. If it's significantly dull, nicked, or damaged, it's time for a replacement.
- Position the knife: Place the knife on a stable, flat surface. Make sure you have a clear view of the blade release mechanism.
Step 2: Releasing the Old Blade
This step varies slightly depending on the specific Husky utility knife model. However, most models utilize one of the following mechanisms:
- Slider Mechanism: Locate the slider or button on the knife's body. This is usually positioned near the blade. Gently slide the mechanism to release the blade's locking mechanism. Then, carefully pull the used blade out from the knife.
- Button Mechanism: Many Husky knives utilize a button mechanism. Press the button while gently pulling the blade towards you. The used blade should slide out of the housing.
- Lever Mechanism: Some models feature a lever. Carefully lift or depress the lever to disengage the blade.
Important Note: If you’re unsure about the release mechanism, consult the user manual that came with your knife. If you've lost the manual, search online for "[Your Husky Knife Model Number] user manual" to access a digital version.
Step 3: Inserting the New Blade
- Select a new blade: Choose a new blade that’s compatible with your Husky utility knife model. Always use the correct blade size and type as specified in the manual.
- Align the new blade: Carefully insert the new blade into the knife's housing, ensuring it's aligned correctly with the cutting edge facing outwards. Pay attention to any markings on the blade or knife body that indicate proper orientation.
- Secure the new blade: Use the release mechanism (slider, button, or lever) to secure the new blade firmly in place. You should feel a definite click or secure lock indicating the blade is properly installed. Gently try to wiggle the blade to ensure it's securely fastened.
Step 4: Testing the New Blade
Before using the knife for any serious cutting task, perform a test cut on a scrap piece of material (cardboard or soft wood is ideal). This confirms the blade is securely in place and cuts cleanly.
Troubleshooting Common Issues
While changing a Husky utility knife blade is generally straightforward, you might encounter some minor issues:
- The blade won't release: If you’re having trouble releasing the old blade, double-check you’ve correctly identified and operated the release mechanism. If the mechanism is jammed, try gently tapping the knife's body (using a soft material like wood) to dislodge it. Avoid using excessive force, which could damage the knife.
- The new blade won’t stay in place: Ensure the new blade is correctly aligned and fully seated in the housing before locking it into place. A slightly misaligned blade may not lock securely.
- The blade is loose: If the blade feels loose after securing it, re-examine the locking mechanism. If it’s still loose, there might be a problem with the knife’s mechanism, requiring professional repair or replacement.
Maintaining Your Husky Utility Knife
Regular maintenance extends the lifespan of your Husky utility knife and ensures optimal performance. These simple practices will keep your knife in top condition:
- Regular blade changes: Change the blade frequently – don’t wait until it’s extremely dull. A sharp blade is safer and cuts more efficiently.
- Clean the knife: After each use, clean the knife blade and body to remove dirt, debris, and sticky substances. Wipe it down with a clean cloth.
- Store properly: Store your knife in a safe, dry place, preferably in a sheath or case to protect the blade from damage.
Choosing the Right Blade for Your Task
Husky utility knives typically use standard utility blades. However, different blade types are optimized for various applications. Choosing the right blade can significantly impact your efficiency and results:
- Standard blades: These are all-purpose blades ideal for general cutting tasks.
- Hook blades: These are excellent for scraping and cutting close to surfaces.
- Triangle blades: These are suited for precise cuts and detail work.
Understanding the different blade types allows you to select the best tool for each job, maximizing performance and safety.
Conclusion: Safety, Efficiency, and Longevity
Changing a blade on a Husky utility knife is a straightforward process when done correctly. Prioritizing safety, understanding your knife’s mechanism, and following the steps outlined above ensures efficient blade changes and prolongs your knife’s lifespan. Remember regular maintenance and proper blade selection contribute to a safer and more effective work experience. With this comprehensive guide, you'll be equipped to handle all your blade-changing needs confidently and safely.
Latest Posts
Latest Posts
-
Are You Smarter Than A Fifth Grader Lyrics
Mar 17, 2025
-
What Happened To The Real Gracie From Gracies Choice
Mar 17, 2025
-
How Many Feet In A 5k Race
Mar 17, 2025
-
How Far From Nashville To Pigeon Forge
Mar 17, 2025
-
How Many American States Start With The Letter M
Mar 17, 2025
Related Post
Thank you for visiting our website which covers about How To Change The Blade On A Husky Utility Knife . We hope the information provided has been useful to you. Feel free to contact us if you have any questions or need further assistance. See you next time and don't miss to bookmark.
