How To Sew Two Pieces Of Fabric Together
Arias News
Mar 30, 2025 · 7 min read
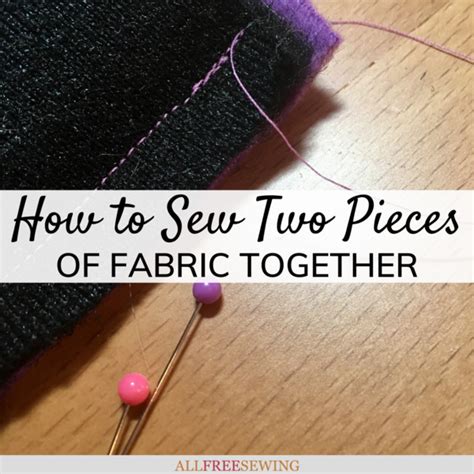
Table of Contents
How to Sew Two Pieces of Fabric Together: A Comprehensive Guide
Sewing two pieces of fabric together is a fundamental skill in sewing, forming the basis for countless projects, from clothing and quilts to home decor and accessories. This comprehensive guide will walk you through the process, covering everything from choosing the right tools and fabrics to mastering different seam types and finishing techniques. Whether you're a complete beginner or looking to refine your skills, this guide will equip you with the knowledge to confidently sew strong, beautiful, and professional-looking seams.
I. Gathering Your Supplies: Essential Tools and Materials
Before embarking on your sewing journey, ensuring you have the right tools and materials is crucial. Having everything prepared beforehand minimizes interruptions and ensures a smoother sewing experience.
A. Fabrics: Choosing the Right Materials
The type of fabric you choose significantly impacts the sewing process and the final result. Different fabrics have varying weights, textures, and properties, influencing how they behave during stitching.
- Lightweight fabrics: Such as cotton lawn, silk, or chiffon, are delicate and require a fine needle and a gentle touch to prevent damage.
- Medium-weight fabrics: Including cotton poplin, linen, and chambray, are more robust and easier to work with.
- Heavyweight fabrics: Like denim, canvas, or upholstery fabrics, demand stronger needles and potentially a more powerful sewing machine.
Consider the project's intended use and the desired aesthetic when selecting your fabric. Pre-washing your fabrics before sewing is highly recommended to prevent shrinkage and ensure colorfastness.
B. Essential Sewing Tools
Having the right tools at hand streamlines the process and makes sewing more enjoyable. Here are the must-have tools:
- Sewing machine: A reliable sewing machine is the workhorse of this process. Familiarize yourself with its functions and settings.
- Needles: Choose the appropriate needle size for your fabric weight. Size ranges from fine needles for delicate fabrics to heavy-duty needles for thick materials.
- Thread: Select thread that complements your fabric in both color and weight. Using high-quality thread contributes to a stronger, more durable seam.
- Scissors: Sharp fabric scissors are essential for clean cuts. Avoid using them for cutting paper to maintain their sharpness.
- Pins: Use straight pins to hold fabric pieces together before stitching, ensuring they are placed perpendicular to the seam line to prevent distortion.
- Seam ripper: A seam ripper is invaluable for removing stitches when necessary, allowing for easy corrections and adjustments.
- Measuring tape: Accurate measurements are fundamental in sewing. Use a measuring tape to ensure precise cutting and placement.
- Iron and ironing board: Pressing your fabric and seams at each stage helps maintain a neat and professional finish.
II. Preparing Your Fabric: Cutting and Marking
Precise cutting and accurate marking are vital for achieving a well-fitted and aesthetically pleasing final product.
A. Cutting the Fabric
- Check the grain: Ensure the fabric is aligned with the grain (the lengthwise and crosswise threads) before cutting. Incorrect grain alignment can lead to distortion and ill-fitting garments.
- Use sharp scissors: Sharp scissors provide clean, precise cuts, minimizing fraying and ensuring accurate seams.
- Cut carefully: Work slowly and accurately to avoid mistakes. If necessary, use pattern weights to hold the pattern in place.
- Add seam allowance: Remember to add the appropriate seam allowance (typically ¼ inch to ½ inch) to your cutting lines to accommodate for the seam itself.
B. Marking the Fabric
Marking the fabric accurately ensures precise stitching and helps prevent mistakes.
- Use appropriate marking tools: Tailors' chalk, marking pens (washable or disappearing), or pins can be used for marking.
- Mark seam lines: Clearly mark the seam lines on the fabric to guide your stitching.
- Mark notches and other markings: Notches and other markings (as indicated on patterns) should be carefully marked to ensure correct assembly.
- Test markings: Always test your chosen marking tool on a scrap piece of fabric to ensure it shows up clearly and removes easily.
III. Stitching the Fabric: Seam Types and Techniques
This section delves into the practical steps of joining two fabric pieces, covering different seam types and best practices.
A. Basic Straight Stitch: The Foundation of Sewing
The straight stitch is the most fundamental sewing stitch, used for creating strong and reliable seams.
- Align the fabric: Pin the two fabric pieces together, aligning the raw edges and ensuring they are flush.
- Set up your sewing machine: Select a straight stitch and adjust the stitch length to a suitable setting (around 2.5 mm is a good starting point).
- Sew along the seam line: Carefully guide the fabric under the presser foot, following the marked seam line. Maintain a consistent speed and avoid pulling or tugging the fabric.
- Backstitch at the beginning and end: To reinforce the seam, backstitch (reverse stitch) a few stitches at the beginning and end of the seam.
B. Other Common Seam Types
Beyond the straight stitch, various seam types offer specific advantages depending on the project and desired finish.
- French seam: This seam encloses the raw edges, creating a neat and professional finish. It's ideal for lightweight fabrics.
- Hong Kong seam: A more decorative seam featuring bias binding to encase the raw edges. It’s excellent for high-end garments.
- Flat-felled seam: A strong and durable seam commonly used in denim and other heavy-duty fabrics. It creates a flat, clean finish on one side.
- Serged seam: A seam finished using an overlock machine, preventing fraying and creating a professional, neat look. This is particularly advantageous when working with fabrics prone to fraying.
C. Tips for Professional Stitching
- Use the right needle and thread: Ensure you are using the correct needle size and thread weight for your fabric. The wrong combination can lead to broken needles or skipped stitches.
- Maintain a consistent seam allowance: Keep the seam allowance consistent throughout the project for a neat, professional appearance.
- Press your seams: Pressing seams open or to one side helps create a flat, well-finished garment.
- Use a walking foot: A walking foot can be beneficial when working with multiple layers of fabric or difficult-to-handle materials. It helps to feed the fabric evenly, ensuring smooth stitching.
IV. Finishing Your Seam: Techniques for Durability and Aesthetics
Finishing your seam is just as important as the stitching itself. A well-finished seam adds to the garment's overall quality and longevity.
A. Overlocking/Serging
Overlocking or serging uses a specialized machine to create a neat and durable finish on raw edges. It prevents fraying and adds a professional touch.
B. Zigzag Stitch
A zigzag stitch is a simple way to prevent fraying. It’s particularly useful for lightweight fabrics that are prone to fraying.
C. Binding
Binding is a decorative and functional way to finish seam edges. It involves wrapping a strip of fabric around the raw edge, creating a neat and polished finish.
D. Pinking Shears
Pinking shears create a zig-zag cut that can minimize fraying. It’s a quick and easy method for finishing seams, but it's less durable than other methods.
V. Troubleshooting Common Sewing Problems
Even experienced sewers encounter problems. Here are some common issues and solutions:
- Skipped stitches: Check the needle, thread, and tension settings. A bent needle or incorrect tension can cause skipped stitches.
- Broken needles: Use the correct needle for your fabric weight. Avoid forcing the fabric through the machine.
- Uneven seams: Ensure the fabric is fed evenly through the machine and maintain a consistent speed.
- Puckering: Check the fabric's tension; too much tension can cause puckering. Pressing the seams can also alleviate puckering.
VI. Advanced Techniques and Seam Variations
Once you've mastered the basics, you can explore advanced techniques to further elevate your sewing skills.
- Seam finishing techniques: Explore more advanced seam finishes, such as bound seams, French seams, and Hong Kong seams for higher-quality results.
- Working with different fabric types: Practice sewing with various fabrics such as silk, velvet, and leather to broaden your skillset.
- Using different stitch types: Experiment with decorative stitches to add visual interest and personality to your projects.
Conclusion
Sewing two pieces of fabric together is a rewarding skill that unlocks a world of creative possibilities. With practice and attention to detail, you can master this fundamental technique, creating strong, beautiful, and durable seams. By following the steps outlined in this guide and continually practicing, you’ll build confidence and transform your sewing projects from simple creations into well-crafted garments and projects. Remember to always experiment, adapt techniques to suit your needs, and enjoy the process of learning and creating. Happy sewing!
Latest Posts
Latest Posts
-
Distance From Arlington Tx To Dallas Tx
Apr 01, 2025
-
How Many Minutes Drive Is 5 Miles
Apr 01, 2025
-
What Percentage Is 11 Out Of 15
Apr 01, 2025
-
What Year Were You Born If Your 31
Apr 01, 2025
-
How Many Cups Are In 3 Lbs Of Sour Cream
Apr 01, 2025
Related Post
Thank you for visiting our website which covers about How To Sew Two Pieces Of Fabric Together . We hope the information provided has been useful to you. Feel free to contact us if you have any questions or need further assistance. See you next time and don't miss to bookmark.
