Opening In A Wall To Let Air Or Light
Arias News
Mar 21, 2025 · 6 min read
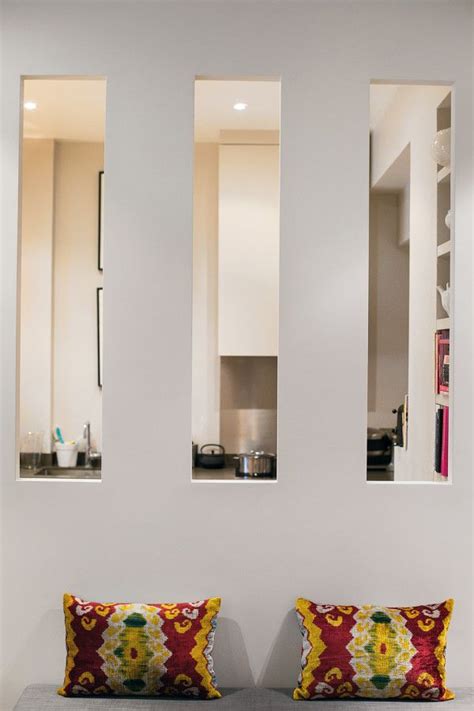
Table of Contents
Opening in a Wall to Let Air or Light: A Comprehensive Guide
Creating openings in walls for air circulation or light penetration is a common home improvement project. However, it's crucial to approach this task with careful planning and execution to ensure structural integrity, energy efficiency, and aesthetic appeal. This comprehensive guide covers everything you need to know, from planning and permitting to installation and finishing. We'll explore different opening types, materials, and considerations for both interior and exterior walls.
Planning and Preparation: The Foundation of a Successful Project
Before you even pick up a hammer, thorough planning is essential. This phase prevents costly mistakes and ensures a smooth process.
1. Assessing Your Needs and the Existing Structure:
- Purpose: Clearly define the purpose of the opening. Is it primarily for ventilation, natural light, or both? This dictates the size, location, and type of opening. A small opening might suffice for ventilation, while a larger one is needed for significant light ingress.
- Wall Type: Determine the wall's construction. Is it load-bearing (supporting the roof or upper floors)? Knowing this is crucial. Opening a load-bearing wall requires significant structural reinforcement, potentially necessitating professional engineering expertise. Non-load-bearing walls are easier to modify.
- Location: Carefully consider the placement of the opening. Maximize light and air circulation while minimizing disruption to existing features like electrical wiring, plumbing, and insulation. Think about the view from the inside and outside, and potential effects on privacy.
- Size and Shape: Sketch the desired opening’s dimensions and shape. Consider architectural harmony with the existing structure. A rectangular opening is the most common and easiest to construct, but arched or other custom shapes are achievable with additional effort.
2. Obtaining Necessary Permits and Approvals:
Depending on your location and the scope of the project, you might need building permits. Check with your local building department for requirements. Failure to obtain permits can result in fines or even necessitate demolition of unauthorized work.
3. Gathering Tools and Materials:
The tools and materials needed will vary depending on the wall type, opening size, and chosen framing method. However, some common essentials include:
- Measuring tools: Tape measure, level, square
- Cutting tools: Circular saw, reciprocating saw (for cutting through brick or concrete), masonry drill (for brick or concrete)
- Safety equipment: Safety glasses, dust mask, work gloves, ear protection
- Framing materials: Wood studs, header (for load-bearing walls), plywood sheathing
- Fasteners: Nails, screws
- Insulation: Batt insulation, spray foam insulation (consider energy efficiency)
- Finishing materials: Drywall, trim, paint, sealant
Creating the Opening: A Step-by-Step Guide
The specific steps involved will vary depending on the wall type and the size of the opening. However, here is a generalized guide:
1. Marking and Cutting the Opening:
- Precise Marking: Use a pencil and level to mark the precise dimensions of the opening on the wall. Double-check your measurements several times.
- Cutting the Opening: Carefully cut the opening using the appropriate tools. If it's a load-bearing wall, this step requires extra caution and potentially the use of a specialized cutting tool and/or professional assistance.
2. Installing a Header (Load-Bearing Walls Only):
If you are opening in a load-bearing wall, installing a header is crucial to maintain structural integrity. This distributes the weight above the opening to adjacent structural members. This is a complex process that often necessitates professional help. Incorrectly installed headers can compromise the structural integrity of your home.
- Measuring and Cutting the Header: The header should span the width of the opening plus several inches on each side. The header is typically made of engineered wood, which is stronger than standard lumber.
- Installing the Header: The header is supported by king studs (longer studs on either side of the opening) that are securely anchored to the existing wall framing.
3. Framing the Opening:
Once the opening is cut, the framing helps maintain the integrity of the wall. This involves installing vertical studs (king studs and jack studs) and horizontal plates that run along the top and bottom of the opening.
- Securing the Framing: Use appropriate fasteners to securely attach the framing to the existing wall structure.
4. Installing Insulation and Vapor Barrier:
Proper insulation minimizes energy loss through the opening. Ensure proper installation of insulation and a vapor barrier to prevent moisture buildup.
5. Installing Drywall or Other Cladding:
Finish the opening by installing drywall or other appropriate cladding material. Use appropriate taping and mudding techniques to create a seamless finish.
6. Finishing Touches:
- Caulk and Seal: Seal all gaps and seams to prevent air leaks and moisture ingress.
- Painting and Trimming: Paint the opening to match the surrounding wall, and install trim to enhance the aesthetic appeal.
Different Types of Openings and Considerations:
1. Windows:
Windows are commonly used to introduce natural light and, depending on design, ventilation. Consider factors like:
- Window Type: Casement, double-hung, sliding, fixed, etc., each offering different advantages.
- Energy Efficiency: Look for windows with high energy ratings (U-value and solar heat gain coefficient).
- Size and Placement: Maximize natural light while minimizing heat gain or loss.
2. Doors:
Doors can create openings for both air and light, primarily serving as access points. Factors to consider include:
- Door Type: Solid core, hollow core, French doors, sliding doors. Each offers different levels of insulation and soundproofing.
- Thresholds: Ensure proper thresholds are installed to prevent drafts and water ingress.
- Hardware: Choose sturdy and aesthetically pleasing hardware that complements the door.
3. Archways:
Archways offer a more decorative way to create an opening between rooms. Considerations include:
- Arch Style: Choose an arch style that complements your home's architecture.
- Materials: Use materials that match the surrounding wall.
4. Air Vents:
Smaller openings, specifically designed for ventilation, can improve air circulation without compromising wall structure significantly.
- Location: Strategically place vents to maximize airflow.
- Size: Select appropriate vent sizes based on the room's needs.
Exterior Wall Openings: Additional Considerations
Opening in exterior walls presents additional challenges compared to interior walls. These include:
- Weatherproofing: Exterior openings must be thoroughly weatherproofed to prevent water damage and energy loss. This includes proper flashing, caulking, and sealing.
- Structural Integrity: Exterior walls are more susceptible to weather-related damage, so proper reinforcement is crucial.
- Building Codes: Exterior openings are subject to stricter building codes.
When to Call a Professional:
While some simple openings in non-load-bearing walls are DIY-friendly, it's crucial to call a professional in the following situations:
- Load-bearing walls: Opening a load-bearing wall requires expertise in structural engineering.
- Complex openings: Arched or unusually shaped openings require specialized skills and tools.
- Extensive electrical or plumbing work: If the opening necessitates significant alterations to existing electrical wiring or plumbing, a professional electrician or plumber should be involved.
- Lack of experience: If you are not comfortable with DIY home improvement projects, it is best to hire a professional to avoid potential errors and safety risks.
Creating openings in walls for air or light can significantly improve your home's functionality and aesthetics. However, thorough planning, careful execution, and adherence to safety regulations are critical for a successful outcome. Remember to prioritize safety and, when in doubt, consult a professional. This comprehensive guide provides a strong foundation for your project, ensuring you can approach it with confidence and achieve the desired results.
Latest Posts
Latest Posts
-
How Many Seconds Are In 40 Years
Mar 28, 2025
-
What Is An Eighth Of An Inch
Mar 28, 2025
-
How Many Hours From 7am To 9pm
Mar 28, 2025
Related Post
Thank you for visiting our website which covers about Opening In A Wall To Let Air Or Light . We hope the information provided has been useful to you. Feel free to contact us if you have any questions or need further assistance. See you next time and don't miss to bookmark.
