When Can You Change Your Tongue Bar
Arias News
Mar 24, 2025 · 5 min read
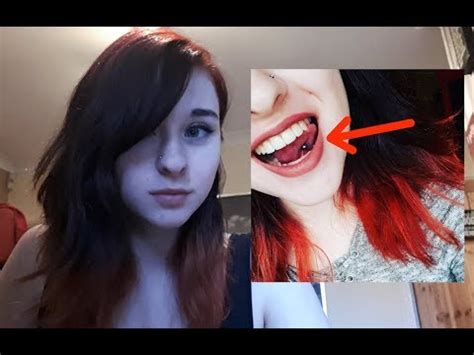
Table of Contents
When Can You Change Your Tongue Bar? A Comprehensive Guide
Getting a tongue piercing is a big decision, a commitment to a certain level of discomfort and aftercare. But once that initial healing period is over, the fun begins – choosing your perfect tongue jewelry! However, knowing when you can safely change your tongue bar is crucial to avoid infection and complications. This comprehensive guide will walk you through the entire process, from understanding the healing stages to the safe and effective techniques for changing your piercing.
Understanding the Healing Process: The Timeline
The healing process for a tongue piercing is relatively fast compared to other piercings, typically ranging from 4 to 8 weeks. However, "fully healed" doesn't mean it's fully mature. Complete healing can take anywhere from 6 to 12 months, and even longer for some individuals.
Phase 1: The Initial Healing (Weeks 1-4)
This is the most critical phase. Your tongue will be swollen, potentially bruised, and quite sensitive. Expect some bleeding and discomfort. During this time:
- Absolutely do not change your jewelry. The piercing is still incredibly vulnerable to infection. Attempting to remove or change the bar will almost certainly lead to complications.
- Focus on meticulous aftercare. This includes gentle saltwater rinses, maintaining excellent oral hygiene, and avoiding irritants like alcohol, smoking, and spicy foods.
Phase 2: The Intermediate Healing (Weeks 5-8)
The swelling should have subsided significantly, and the pain will be minimal. However, the piercing is still healing internally.
- Still proceed with caution. While some piercers might suggest changing the jewelry around this time (with their guidance), it's generally safer to wait longer. The risk of infection remains.
- Continue with diligent aftercare. Consistency is key during this stage.
Phase 3: The Late Healing and Beyond (Weeks 8+)
By week 8, most of the external swelling should have gone, and the piercing site should appear largely healed. However, the internal tissue continues to mature.
- You might be able to change the jewelry, but proceed with extreme care and only if you feel comfortable. If you’re unsure, it's always better to err on the side of caution and wait.
- Consider professional assistance: If possible, schedule an appointment with your piercer to have them change the jewelry. They have the experience and sterile tools to minimize the risk of complications.
- Even after changing the jewelry, continue gentle aftercare. The piercing remains susceptible to infection for months.
Factors Influencing Healing Time
Several factors can affect how long your tongue piercing takes to heal:
- Your body's natural healing ability: Some individuals heal faster than others.
- Aftercare practices: Diligent aftercare significantly reduces the risk of complications and speeds up healing.
- Piercing technique: A professional piercing with sterile equipment and proper technique minimizes trauma, promoting faster healing.
- Material of the initial jewelry: Biocompatible metals (like implant-grade titanium or niobium) generally promote better healing than others.
- Overall health: Underlying health conditions can impact healing time.
Signs of Infection and When to Seek Medical Attention
Even with the best aftercare, infection is a possibility. Watch for these warning signs:
- Increased pain and swelling: Beyond the normal initial swelling.
- Excessive bleeding: More than a small amount of blood.
- Pus or discharge: Yellowish or greenish fluid indicates an infection.
- Red streaks emanating from the piercing: This could signify a spreading infection.
- Fever or chills: These are serious symptoms requiring immediate medical attention.
- Persistent throbbing pain: Pain that doesn't improve with aftercare.
If you experience any of these symptoms, contact your piercer or a doctor immediately. Delaying treatment can lead to serious complications.
Choosing the Right Jewelry: Material and Size
Once your piercing is healed enough to consider changing jewelry, you need to choose the right replacement.
Material: Opt for Biocompatibility
The material is crucial. Stick to biocompatible materials like:
- Implant-grade titanium: A highly biocompatible metal, resistant to corrosion and less likely to cause allergic reactions.
- Niobium: Another excellent biocompatible option, also hypoallergenic.
- Surgical stainless steel: A widely used option, but less biocompatible than titanium or niobium. Check for 316L grade for higher quality.
- 14k or 18k gold: High-quality gold is generally well-tolerated, but some individuals might still experience reactions.
Avoid:
- Nickel: A common allergen that can cause significant irritation.
- Cheap metals: These may contain irritants and increase the risk of infection.
Size: Matching Your Piercing
The size of your new jewelry should be similar to the initial bar's length and gauge (thickness). A bar that is too short might cause irritation and embedding, while one that's too long can snag and increase the risk of accidental damage. Your piercer can advise you on the best size.
How to Change Your Tongue Bar Safely: A Step-by-Step Guide
Remember, this should only be done after sufficient healing and ideally with the assistance of your piercer. If you attempt this too early or improperly, you risk significant complications.
What you'll need:
- New tongue bar of the correct size and material.
- Clean hands: Wash thoroughly with soap and water.
- Clean gloves: Optional, but recommended.
- Antiseptic solution: Such as saline solution.
- Paper towels: For hygiene.
Steps:
- Wash your hands thoroughly: Use antibacterial soap and water.
- Prepare the area: Gently rinse your mouth with a saline solution.
- Remove the old jewelry: Using clean fingers or tweezers (carefully!), gently unscrew or unclip the existing bar. Do this slowly and steadily to avoid irritating the piercing.
- Insert the new jewelry: Carefully thread the new bar through the piercing. Ensure it's securely fastened.
- Rinse your mouth: Rinse again with saline solution.
- Observe: Monitor the piercing for any signs of irritation or infection over the following days.
When to See Your Piercer
It's highly recommended to have your piercer change your jewelry, especially the first few times. They are experienced in handling piercings and have sterile equipment, minimizing risks. Contact them if you have any concerns or if you experience any complications.
Conclusion: Patience and Proper Care are Key
Changing your tongue bar is a privilege that comes after careful healing and appropriate aftercare. Don't rush the process; patience is crucial. Always prioritize your health and safety. Consulting your piercer, following their advice, and practicing meticulous hygiene will ensure your tongue piercing stays beautiful and healthy for years to come. Remember that consistent aftercare, even after changing your jewelry, is crucial for long-term health and minimizes the risk of complications. Your body is thanking you for taking this seriously!
Latest Posts
Latest Posts
-
1 Liter Is How Many Bottles Of Water
Mar 26, 2025
-
Is Nia Peeples Related To Mario Van Peebles
Mar 26, 2025
-
How To Address An Envelope To A Widow
Mar 26, 2025
-
How Many Slices Is 1 2 Pound Of Brisket
Mar 26, 2025
-
How Many Tons Are In 6000 Pounds
Mar 26, 2025
Related Post
Thank you for visiting our website which covers about When Can You Change Your Tongue Bar . We hope the information provided has been useful to you. Feel free to contact us if you have any questions or need further assistance. See you next time and don't miss to bookmark.
