1995 Toyota Corolla 1.8 How To Fill Ac Sys
Arias News
Mar 25, 2025 · 6 min read
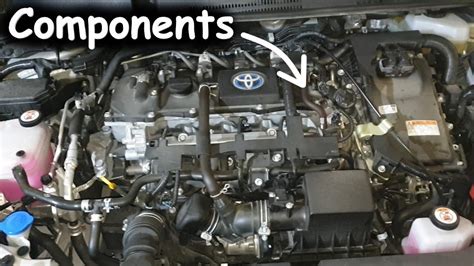
Table of Contents
1995 Toyota Corolla 1.8: A Comprehensive Guide to AC System Recharging
The 1995 Toyota Corolla 1.8, a reliable and popular vehicle of its time, often requires AC system attention as it ages. While professional servicing is always recommended, understanding the basics of AC recharging can empower you to diagnose minor issues and potentially save on repair costs. This comprehensive guide provides a step-by-step approach to recharging your 1995 Toyota Corolla 1.8's AC system, focusing on safety, accuracy, and the importance of professional assistance when needed.
Disclaimer: This guide provides general information and should not be considered a substitute for professional AC repair. Improper handling of refrigerants can be dangerous. Always prioritize safety and seek professional help if you are unsure about any step.
Understanding Your 1995 Corolla's AC System
Before diving into the recharge process, let's briefly understand the components involved. The AC system in your 1995 Toyota Corolla 1.8 uses refrigerant, typically R-134a (check your vehicle's documentation to confirm), to cool the air. This refrigerant circulates through a closed system comprising:
- Compressor: This is the heart of the system, compressing the refrigerant.
- Condenser: This component dissipates heat from the compressed refrigerant, converting it to a liquid.
- Expansion Valve (or Orifice Tube): This regulates the flow of refrigerant into the evaporator.
- Evaporator: This is where the liquid refrigerant absorbs heat from the air, cooling it.
- Receiver/Drier: This component filters out moisture and contaminants from the refrigerant.
Identifying AC System Problems Before Recharging
Attempting to recharge a system with underlying problems is futile and potentially damaging. Before you even think about adding refrigerant, carefully assess the following:
1. System Leaks:
- Visual Inspection: Look for signs of oil leaks around the AC components. Refrigerant oil is usually a light green or amber color.
- UV Dye Test: A professional mechanic can inject a UV dye into the system to easily identify leaks under a UV light. This is crucial for pinpointing leaks that aren't immediately visible.
- Pressure Test: A pressure test performed by a mechanic accurately detects leaks in the system. A slow leak will cause a gradual pressure drop, indicating a need for repair before recharging.
2. Compressor Issues:
A faulty compressor is a major problem. Symptoms include:
- No cold air: This is the most obvious sign.
- Loud noises: Grinding, clicking, or whining sounds from the compressor indicate potential failure.
- Clutch engagement problems: The compressor clutch may not engage properly, preventing the compressor from running.
3. Condenser Problems:
A damaged condenser, often due to impact or corrosion, can also significantly impact the system's cooling capacity. Look for:
- Bent fins: Straighten slightly bent fins carefully. Severely damaged fins require replacement.
- Leaks: Look for signs of refrigerant leaks.
4. Expansion Valve/Orifice Tube Problems:
These components regulate refrigerant flow. Malfunction can result in:
- Uneven cooling: Some vents blow cold air while others blow warm air.
- Insufficient cooling: The system might produce cool air, but not adequately cold air.
5. Low Refrigerant:
This is the most common reason for reduced cooling. However, low refrigerant is often a symptom, not the root cause. Addressing underlying leaks is paramount before recharging.
Tools and Materials Needed for AC Recharging
If you've confirmed that there are no major issues and only need to add refrigerant, you'll need the following:
- Refrigerant (R-134a): Ensure you purchase the correct type of refrigerant for your 1995 Corolla. The amount needed depends on your system's capacity. Check your vehicle's manual or consult a professional for the correct amount.
- AC Refrigerant Charging Kit: This kit includes hoses, gauges, and fittings specifically designed for R-134a. Choose a kit with clear, easy-to-read gauges.
- Gloves and Safety Glasses: Always wear appropriate safety gear when handling refrigerants.
- Wrench (for accessing refrigerant ports): The size of the wrench needed will depend on your specific vehicle model. Check your vehicle's manual for the correct size and location of the low-side and high-side service ports.
- Vehicle Manual: This provides vital information about your AC system's specifics, including refrigerant type and capacity.
Steps for Recharging the AC System (After Leak Check and Repair)
Again, we strongly recommend professional assistance for this process. Improper handling of refrigerants can be dangerous.
-
Prepare the Vehicle: Park your 1995 Corolla on a level surface and turn off the engine. Allow the engine to cool down before proceeding.
-
Locate Service Ports: Consult your vehicle's manual to pinpoint the low-side and high-side service ports on the AC system. These are typically capped.
-
Connect the Charging Kit: Connect the hoses from your charging kit to the low-side and high-side service ports (usually a low-side port only for adding refrigerant). Ensure the connections are tight and secure.
-
Check System Pressure: Turn on the AC and monitor the pressure gauges on your charging kit. The low-side pressure should be within the manufacturer's specifications (consult your vehicle's manual). This pressure indicates the current charge level.
-
Add Refrigerant: If the pressure is low, slowly add refrigerant according to the manufacturer's recommendations. Monitor the gauges closely and avoid overcharging. Overcharging can damage the compressor.
-
Monitor Pressure and Temperature: Once the desired pressure is reached, let the system run for a few minutes to check for leaks or other problems. Check both high-side and low-side pressures.
-
Disconnect the Charging Kit: After adding refrigerant, carefully disconnect the charging kit from the service ports. Remember to safely cap the ports.
-
Test the AC System: Start the engine and turn on the AC. Check the vents for cold air. If the cooling is insufficient, repeat the process (only if you have confirmed no leaks and have professional experience).
Maintaining Your AC System
Preventative maintenance is key to prolonging the life of your AC system:
- Regular Inspections: Have your AC system inspected by a professional mechanic annually or every two years, especially if you live in a hot climate.
- Air Filter Replacement: A clean air filter improves airflow and overall system efficiency.
- Avoid Overuse: Avoid running the AC continuously at maximum capacity, especially during long trips.
- Professional Service: Regularly scheduled professional maintenance ensures optimal performance and longevity.
Conclusion
Recharging your 1995 Toyota Corolla 1.8's AC system can seem straightforward, but it's a delicate process. Understanding the potential issues, the tools needed, and the step-by-step procedure are crucial. However, the safety concerns and the potential for further damage if a problem is missed cannot be stressed enough. Always err on the side of caution and seek professional help whenever necessary. A qualified mechanic possesses the expertise, tools, and safety equipment to accurately diagnose and address any problems, ensuring your AC system operates safely and efficiently for years to come. Remember that this guide is for informational purposes only and should not replace professional advice. Always prioritize safety and consult with a qualified mechanic for any AC system repairs or maintenance.
Latest Posts
Latest Posts
-
The Answer To An Addition Problem Is Called The
Mar 26, 2025
-
How Many Feet Are In An Acre Perimeter
Mar 26, 2025
-
How Many Quarts Are In 10 Pounds
Mar 26, 2025
-
8pm To 4am Is How Many Hours
Mar 26, 2025
-
Whats The Average Height For A 6th Grade Boy
Mar 26, 2025
Related Post
Thank you for visiting our website which covers about 1995 Toyota Corolla 1.8 How To Fill Ac Sys . We hope the information provided has been useful to you. Feel free to contact us if you have any questions or need further assistance. See you next time and don't miss to bookmark.
